 +86-13752771911
 E-mail:ptfetube@yozonetech.cn


Expert Guide: How to Clean Silicone Tubing & Avoid 5 Common Mistakes
September 8, 2025
Abstract
The integrity and cleanliness of silicone tubing are paramount across a spectrum of applications, from medical and food-grade contexts to industrial and laboratory settings. This document provides a comprehensive examination of the principles and practices for how to clean silicone tubing effectively. It moves beyond superficial instructions to explore the material science of silicone, its vulnerabilities, and the specific nature of contaminants like biofilms. A central focus is the detailed analysis of five common yet detrimental mistakes made during the cleaning process: the use of incompatible chemicals, the application of excessive physical force, inadequate rinsing and drying protocols, disregard for temperature limits, and the adoption of a uniform cleaning approach for diverse applications. By elucidating the chemical, physical, and biological rationales behind proper maintenance, this guide aims to equip both professionals and enthusiasts with the knowledge to preserve the tubing’s structural integrity, ensure sanitary conditions, and extend its operational lifespan. The objective is to foster a deeper understanding that transforms cleaning from a routine task into a deliberate practice of material care and safety assurance.
Key Takeaways
- Always use mild, non-abrasive detergents like dish soap for general cleaning.
- Avoid harsh chemicals such as bleach or strong solvents that degrade silicone.
- Use soft-bristled brushes and gentle pressure to prevent micro-scratches.
- Mastering how to clean silicone tubing involves thorough rinsing to remove all residue.
- Ensure tubing is completely dry before storage to inhibit microbial growth.
- Verify the specific temperature rating of your tubing before using heat for sterilization.
- Tailor your cleaning method to the tubing’s specific application, whether food-grade or industrial.
Table of Contents
- The Unseen World Within: Why Cleaning Silicone Tubing Matters
- A Preparatory Framework: Gathering Your Tools and Mindset
- The First Common Mistake: Using Incompatible Cleaning Chemicals
- The Second Common Mistake: Applying Excessive Physical Force
- The Third Common Mistake: Neglecting Proper Rinsing and Drying
- The Fourth Common Mistake: Ignoring Temperature Limitations
- The Fifth Common Mistake: Employing a One-Size-Fits-All Cleaning Method
- A Step-by-Step Guide to Flawless Silicone Tube Maintenance
- Frequently Asked Questions (FAQ)
- Conclusion
- References
The Unseen World Within: Why Cleaning Silicone Tubing Matters
When we hold a piece of silicone tubing, its smooth, flexible nature might suggest a simple, inert conduit. It feels clean, almost self-sufficient. Yet, to perceive it as such is to overlook a complex interplay of material science and microbiology. The act of cleaning this seemingly straightforward object is not merely about aesthetic upkeep; it is an engagement with the very properties that make silicone so useful, as well as the microscopic life that can compromise its function. Understanding why we must clean it, and clean it correctly, requires us to peer into this unseen world.
A Matter of Material Science: Understanding Silicone’s Properties
Before one can truly grasp how to maintain silicone, one must first appreciate what it is. Silicone is not a simple plastic derived from petroleum. It is a synthetic polymer, a class of materials known as siloxanes. Imagine a molecular chain. For most plastics, like polyethylene, that chain’s backbone is made of carbon atoms linked together. For silicone, the backbone is composed of alternating silicon and oxygen atoms (–Si–O–Si–O–). Attached to these silicon atoms are organic side groups, typically methyl groups.
This unique structure is the source of silicone’s celebrated virtues. The silicon-oxygen bond is incredibly strong and stable, much like the bonds found in quartz or glass, which grants silicone its remarkable resistance to high temperatures and ultraviolet light. The long, flexible polymer chains can slide past one another easily, giving the material its characteristic rubbery feel. Its surface is also hydrophobic, meaning it repels water, which might lead one to believe it repels everything. This, however, is a misconception. While it resists water, its surface possesses a certain energy that can attract oils, residues, and provides a landscape upon which microorganisms can settle. The material is durable, yet it is not invincible. Certain chemicals can attack that stable Si-O backbone, while physical abrasion can create microscopic fissures that compromise its integrity (LinkedIn, 2024). Cleaning, therefore, is a delicate negotiation with this chemistry—an effort to remove foreign matter without harming the foundational structure of the material itself.
Biofilms: The Invisible Residents of Your Tubing
Now, let us consider what we are cleaning away. Often, it is more than just loose debris or a simple stain. In many applications, especially those involving fluids, the primary adversary is biofilm. Think of a biofilm not as a simple layer of germs, but as a sophisticated, structured community of microorganisms. It begins when a few free-floating bacteria or fungi happen upon the inner surface of the tube. They adhere, perhaps finding a microscopic imperfection to anchor onto. Once attached, they begin to secrete a slimy, glue-like substance composed of polysaccharides, proteins, and DNA.
This substance, known as the extracellular polymeric substance (EPS) matrix, is a marvel of microbial engineering. It acts as a protective shield, encasing the colony and protecting it from threats like antibiotics, chemical disinfectants, and even the shear force of flowing liquids. Within this fortress, the microorganisms multiply, forming a complex, three-dimensional city with channels for water and nutrients to flow through. A mature biofilm is not just a passive film; it is a living, resilient ecosystem. For anyone using silicone tubing for beverages, medical fluids, or in a laboratory, the presence of biofilm is a profound concern. It can lead to persistent contamination, introduce unpleasant tastes and odors, and in clinical settings, pose a serious health risk (Donlan & Costerton, 2002). The smooth-feeling interior of a tube can be deceiving; it might be hosting a thriving, invisible metropolis that only a proper cleaning regimen can dismantle.
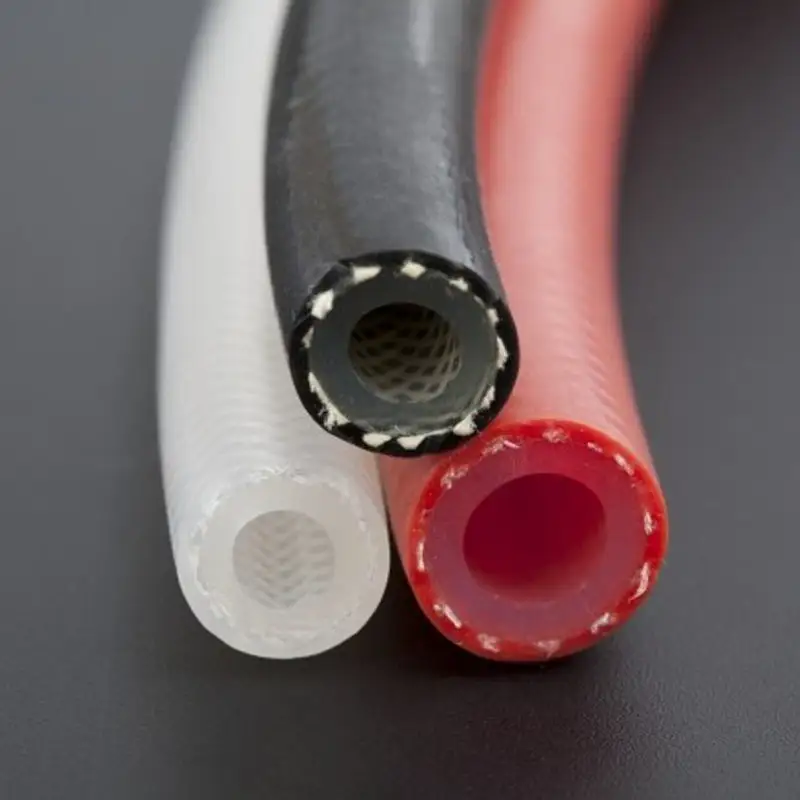
From Kitchen to Laboratory: Application-Specific Contamination Risks
The nature of the contamination risk is not uniform; it is deeply tied to the tubing’s purpose. A tube used in a home brewing setup faces different challenges than one integrated into a dialysis machine or one used to transport industrial lubricants. In a food-grade context, the primary contaminants are sugars, proteins, and fats from the beverages or liquid foods being transferred. These organic materials are a perfect food source for common bacteria and yeasts, accelerating biofilm formation. The resulting contamination can spoil the product, causing off-flavors in beer or souring in milk lines.
In a medical or pharmaceutical setting, the standards are exponentially higher. Here, the concern is not just spoilage but sterility. The contaminants could be pathogenic bacteria, viruses, or endotoxins (toxic substances shed from bacteria). Even a microscopic amount of contamination can have severe consequences for a patient. Consequently, the cleaning process must often be followed by a validated sterilization process, such as autoclaving, which uses high-pressure steam to kill all forms of microbial life.
Conversely, in an industrial setting, the tubing might be exposed to a completely different set of substances: oils, fuels, solvents, or abrasive slurries. Here, the challenge is not primarily biological but chemical. The goal is to remove aggressive chemical residues that could either contaminate the next batch of product or, over time, degrade the silicone itself. For example, certain types of oils can cause some grades of silicone to swell and lose their mechanical strength. Therefore, the cleaning process must be robust enough to remove these substances without using a solvent that is itself harmful to the silicone. Recognizing the specific context of use is the first step in developing an intelligent and effective cleaning strategy.
A Preparatory Framework: Gathering Your Tools and Mindset
Approaching the task of how to clean silicone tubing requires more than just soap and water. It demands a thoughtful preparation of both the physical tools for the job and the intellectual framework to use them correctly. It is an exercise in foresight, where selecting the right agent and the right brush is as foundational as the cleaning itself. This preparation ensures that the process is not only effective but also safe for both the user and the tubing.
Selecting the Right Cleaning Agents: A Chemical Perspective
The choice of a cleaning agent is perhaps the most consequential decision in this process. A cleaner’s purpose is to break down and lift away contaminants. For most common applications, particularly in food and beverage contexts, the most suitable agents are the simplest ones. Mild, non-abrasive, phosphate-free dish soaps are often the best choice. Their surfactant molecules have a dual nature: a hydrophilic (water-attracting) head and a lipophilic (fat-attracting) tail. The tails attach to oily and organic residues on the tubing’s surface, while the heads remain in the water, allowing the entire complex to be washed away.
For more demanding situations where simple soap is insufficient, one might consider specialized cleaners. For example, in brewing or dairy applications, a percarbonate-based cleaner (like OxiClean Free or a dedicated brewery wash) can be highly effective. When mixed with water, it releases hydrogen peroxide and sodium carbonate. The hydrogen peroxide acts as a powerful oxidizing agent, breaking down organic soils, while the sodium carbonate raises the pH, which helps to saponify fats. Another option is a caustic-based cleaner like sodium hydroxide, but these are extremely aggressive and should only be used with great caution on compatible, high-grade silicone and with appropriate personal protective equipment. The key is to match the strength of the cleaner to the severity of the soil, always starting with the mildest effective option.
| Cleaning Agent | Primary Mechanism | Best For | Cautions |
|---|---|---|---|
| Mild Dish Soap | Surfactant action | General food/beverage residue, light oils | Ineffective against heavy biofilm or mineral scale |
| Percarbonate Cleaner | Oxidation | Stubborn organic stains, biofilm (brewing) | Requires warm water; extended contact can affect some materials |
| Isopropyl Alcohol (70%) | Solvent/Disinfectant | Disinfecting, removing some inks and oils | Can cause some silicone grades to temporarily swell; flammable |
| Caustic Soda (NaOH) | Saponification | Heavy industrial grease, protein soils | Highly corrosive; requires expert handling and PPE; not for all silicones |
| Acetic Acid (Vinegar) | pH reduction | Mineral scale (e.g., hard water deposits) | Can leave an odor; may not be suitable for all silicone grades |
The Physical Arsenal: Brushes, Pumps, and Water Pressure
Chemicals dissolve and loosen, but often, physical action is needed to dislodge stubborn particles and biofilms. The choice of physical tool is a balance between efficacy and gentleness. For the interior of the tubing, a long, flexible tube brush is indispensable. The critical factor here is the bristle material. Wire or overly stiff nylon bristles can create micro-scratches on the inner surface of the silicone. While invisible to the naked eye, these scratches increase the surface area and create tiny havens where bacteria can anchor and initiate new biofilm growth, making future cleaning more difficult. The ideal brush has soft, pliable nylon bristles that can scrub effectively without causing damage.
For very long or inaccessible lengths of tubing, a simple brush may not be practical. In these cases, a small recirculation pump can be a powerful ally. By creating a closed loop with a reservoir of cleaning solution, the pump can continuously flush the tubing for an extended period. This method, known as clean-in-place (CIP), leverages both chemical action and the physical force of turbulent flow to scrub the interior surfaces. The velocity of the flow creates shear stress that can rip biofilm from the tube wall. Even a simple setup using a small submersible fountain pump can dramatically improve cleaning outcomes for complex systems. Finally, water pressure from a tap can be used for initial and final rinsing, but it should be a controlled flow, not a high-pressure jet that could stretch or damage the tubing.
Safety First: Personal Protective Equipment and Workspace Setup
Engaging with cleaning chemicals, even mild ones, necessitates a respect for personal safety. At a minimum, wearing waterproof gloves is a sensible precaution to protect the skin from drying out or from potential irritation. When working with stronger agents like percarbonates or isopropyl alcohol, safety glasses become non-negotiable to protect the eyes from accidental splashes. If you are ever working with industrial-strength cleaners like caustic soda, the required personal protective equipment (PPE) escalates to include chemical-resistant gloves, full-face shields, and aprons.
The workspace itself should be well-ventilated, especially when using volatile substances like alcohol or cleaners that release fumes. A large sink or basin is ideal, as it contains the water and cleaning solutions, preventing messes and slips. Having all your tools—brushes, pumps, cleaning agents, and drying racks—organized and within reach before you begin turns the process from a chaotic scramble into a methodical, efficient procedure. Thinking about safety is not a sign of paranoia; it is a mark of a professional and responsible approach to a task, ensuring that the only thing being cleaned is the tubing, not your skin or eyes.
The First Common Mistake: Using Incompatible Cleaning Chemicals
One of the most frequent and damaging errors in caring for silicone tubing is the assumption that its resilience permits the use of any cleaning agent. This is a profound misunderstanding of its chemistry. While robust, silicone is not impervious. The selection of an inappropriate chemical can initiate a process of degradation that is often subtle at first but ultimately leads to material failure. It is an error akin to using sandpaper to clean a glass lens—the intent may be to clean, but the result is irreparable harm.
The Perils of Harsh Solvents: A Recipe for Degradation
Solvents like acetone, toluene, mineral spirits, or gasoline should be considered forbidden territory for silicone tubing. The reason lies in the principle of “like dissolves like.” Silicone’s polymer structure, with its organic side groups, has a certain affinity for non-polar organic solvents. When exposed to such a solvent, the silicone does not dissolve in the way sugar dissolves in water. Instead, the solvent molecules wiggle their way into the spaces between the long polymer chains of the silicone matrix.
This infiltration causes the silicone to swell, sometimes dramatically. The tubing may feel soft, mushy, and enlarged. While some of this swelling might be temporary and could reverse as the solvent evaporates, the damage is often done. The process of swelling and shrinking weakens the internal structure of the polymer, causing a loss of tensile strength and elasticity. The tubing becomes prone to tearing, and its smooth surface can become tacky or crazed. It is a chemical assault that permanently compromises the material’s mechanical properties. Using such solvents is a surefire way to shorten the lifespan of your tubing, turning a durable component into a brittle and unreliable one. A deep understanding of the diverse range of silicone tubing options available can help in selecting a product with inherent resistance to specific chemicals you might encounter.
| Chemical Class | General Compatibility with Silicone | Example(s) | Effect on Silicone |
|---|---|---|---|
| Alcohols (Lower) | Good to Excellent | Isopropyl Alcohol, Ethanol | Minimal effect; may cause slight, temporary swelling |
| Ketones | Poor | Acetone, MEK | Significant swelling, loss of physical properties |
| Chlorinated Solvents | Poor | Methylene Chloride, Trichloroethylene | Severe swelling and chemical attack, rapid degradation |
| Aromatic Hydrocarbons | Poor | Toluene, Xylene, Benzene | Causes extensive swelling and deterioration |
| Strong Acids | Poor to Fair | Concentrated Sulfuric, Nitric Acid | Chemical attack on the polymer backbone, embrittlement |
| Strong Bases (Caustics) | Fair to Good | Sodium Hydroxide | Generally resistant, but high concentrations can cause issues |
| Oils (Petroleum-based) | Poor to Fair | Mineral Oil, Gasoline | Swelling, loss of strength; varies by oil type and silicone grade |
| Water & Dilute Salts | Excellent | Tap Water, Saline Solution | Essentially no effect; highly compatible |
Why Bleach Can Be a Betrayal to Silicone’s Integrity
Household bleach (sodium hypochlorite) is a common go-to for disinfection, so it seems like a logical choice for sanitizing tubing. However, for silicone, it can be a particularly treacherous chemical. While a very dilute, brief exposure might be tolerated by some high-grade silicones, regular or concentrated use is detrimental. The hypochlorite ion is a strong oxidizing agent. It can chemically attack the polymer structure, not just the organic side groups but potentially the silicon-oxygen backbone itself.
This oxidative attack leads to a phenomenon known as embrittlement. The long, flexible polymer chains that give silicone its rubbery quality are broken into shorter, less flexible segments. The tubing loses its elasticity, becoming stiff and hard. It may develop a chalky or frosty appearance on its surface. A tube that was once pliable and could be bent into a tight radius without issue may now crack or split when flexed. This is not just a cosmetic change; it is a fundamental alteration of the material’s character. Using bleach is a betrayal because it takes silicone’s best quality—its flexibility—and systematically destroys it. There are far better, safer alternatives for sanitization, such as heat or percarbonate-based solutions, that achieve the same end without compromising the material.
The Subtle Damage of Abrasive Powders
The third category of chemical incompatibility is not about chemical reaction but physical action at a microscopic level. Abrasive cleaning powders, like Comet or Ajax, or even baking soda used as a thick paste, should never be used on silicone. The temptation is understandable; a tough stain seems to call for a tough scrub. Yet, these powders achieve their cleaning power through abrasion. They are composed of hard, sharp-edged mineral particles (like calcium carbonate or feldspar).
When you scrub the soft, pliable surface of silicone with these hard particles, you are not just wiping away a stain—you are gouging the material. You are creating a network of microscopic scratches, grooves, and pits. As discussed earlier, this damage has two negative consequences. First, it dulls the finish of the tubing, making it appear cloudy and old. Second, and far more importantly, it dramatically increases the effective surface area and creates a perfect, textured landscape for bacteria to attach and form biofilms (Donlan, 2001). The very act of trying to achieve a deeper clean ironically makes the tubing harder to clean in the future and more prone to contamination. It is a classic case of the “cure” being worse than the disease. The smooth, non-porous surface of new silicone is one of its greatest hygienic advantages; using abrasives willfully surrenders that advantage.
The Second Common Mistake: Applying Excessive Physical Force
There is a deeply ingrained intuition that equates effort with results. When something is dirty, we scrub it harder. When a blockage is stubborn, we push with more force. While this logic might apply to cleaning a cast-iron skillet, it is a disastrous approach for silicone tubing. The material’s softness and flexibility are assets, not an invitation for aggressive physical handling. Applying excessive force is a mistake born from a misunderstanding of the material’s limits, leading to damage that is often invisible but significant.
The Myth of “Scrubbing Harder”: When Brushing Becomes Damaging
The impulse to use elbow grease is strong, especially when faced with a persistent residue or a developing biofilm. However, vigorously ramming a brush through a silicone tube, particularly a brush with stiff bristles, is a form of mechanical violence against the polymer. Imagine the inner wall of the tube at a microscopic level. A soft brush with flexible bristles will bend and conform to the surface, gently sweeping away contaminants. A stiff brush, especially when propelled by excessive force, acts like a rake on soft soil.
The bristles dig into the silicone, creating scratches and tears. This is not the same as the chemical damage from solvents, but the result can be similar in one respect: it creates nucleation sites for future contamination. A perfectly smooth surface is difficult for a bacterium to colonize. A surface that has been scoured and roughened, however, offers countless microscopic valleys and crevices where microbes can shelter from fluid flow and cleaning agents, establishing a permanent foothold. The act of “scrubbing harder” can therefore initiate a vicious cycle: the more aggressively you clean, the more damaged the surface becomes, and the more difficult it is to get truly clean in subsequent attempts. The proper technique is one of finesse, not force—letting the cleaning solution do the heavy lifting and using a soft brush for gentle agitation.
High-Pressure Nightmares: Abrasions and Micro-tears
Another form of excessive physical force comes from high-pressure jets of water or air. It can be tempting to use a pressure washer nozzle or a compressed air line to blast out a blockage or speed up the cleaning process. This is a profound error. Silicone tubing, especially standard grades, is not designed to withstand the focused, intense force of a high-pressure stream.
When a high-pressure jet strikes the inner wall of the tubing, it can cause several types of damage. It can cause erosion, literally blasting away tiny particles of the silicone material, similar to how a river carves a canyon over millennia, but on a much faster timescale. This is particularly true if the fluid stream contains any abrasive particles. Even with pure water, the high pressure can stretch the material beyond its elastic limit, causing permanent deformation or, worse, creating micro-tears. These tiny tears are weak points. When the tubing is next put under its normal operating pressure, or when it is flexed or bent, these micro-tears can propagate, leading to a sudden and complete failure of the tube. It is a hidden danger, a structural weakness introduced by a well-intentioned but misguided cleaning method.
Bending and Stretching: Compromising Structural Memory
The flexibility of silicone tubing is one of its most useful features, but it is not limitless. A final form of physical abuse involves improper handling during the cleaning process itself. Forcing the tubing into excessively tight bends to fit it into a sink, or aggressively stretching it to attach it to a faucet, can cause damage. Silicone possesses what is known as “structural memory,” but like any material, it can be pushed beyond its limits.
When you bend a tube too sharply, you create immense stress on the outer wall of the bend, stretching the polymer chains, while simultaneously compressing them on the inner wall. Doing this repeatedly or for a prolonged period can lead to stress cracking or a permanent kink in the tube that restricts flow. Similarly, stretching the tubing excessively can cause a permanent reduction in its diameter and wall thickness once it is released, a phenomenon known as “necking.” This not only weakens the tube but also changes its performance characteristics. The mistake here is treating the tubing as infinitely pliable. It must be handled with a sense of its physical boundaries, coiling it loosely for cleaning and gently easing it onto fittings rather than forcing it. Respecting its flexibility is key to preserving it.
The Third Common Mistake: Neglecting Proper Rinsing and Drying
The cleaning process is often perceived as complete once the soap is applied and the scrubbing is done. However, what happens after the primary cleaning stage is just as foundational to achieving a truly clean and safe tube. The phases of rinsing and drying are not mere afterthoughts; they are an integral part of the protocol. Neglecting them is to leave the job half-finished, potentially creating new problems that are as bad, or worse, than the original contamination. It is like washing your dinner plates and leaving a film of soap on them for your next meal.
The Ghost of Cleaners Past: The Problem of Residue
No matter how mild or “safe” a cleaning agent is, it is not meant to be a permanent resident of your tubing. The purpose of rinsing is to completely remove every last trace of the cleaner. If rinsing is hasty or incomplete, a thin film of chemical residue will remain on the inner surface. This “ghost of the cleaner” can manifest in several problematic ways.
In food and beverage applications, the most immediate consequence is taint. The residue can impart a soapy, chemical taste and odor to anything that subsequently passes through the tube, ruining the flavor of a craft beer, a delicate wine, or purified water. In laboratory or medical settings, the consequences can be more severe. Chemical residue can interfere with sensitive chemical reactions, alter the pH of solutions, or introduce a cytotoxic agent into a cell culture. Some cleaning agents, if left behind, can even interact with the silicone itself over time, potentially causing slow degradation. A thorough rinse, using copious amounts of clean water, is the only way to exorcise this ghost and ensure the tube is truly neutral and ready for service. The water should run until there is no sign of suds or slipperiness, and ideally, a final rinse with purified or distilled water can help prevent mineral deposits.
A Breeding Ground for Bacteria: The Dangers of Dampness
After a perfect rinse, the tubing is clean, but it is also wet. Leaving it in a damp state is an open invitation for microbial growth. Bacteria, yeasts, and molds thrive in moist environments. A coil of clean-but-wet tubing, left in a dark cupboard, is the ideal incubator. Even a few surviving microorganisms that were not eliminated during the cleaning phase can multiply rapidly in the presence of residual moisture, quickly re-contaminating the entire surface and potentially forming a new biofilm.
Effective drying is therefore not optional; it is a critical control point in preventing re-contamination. The goal is to remove all traces of water from the interior surfaces. Storing tubing while it is still damp undoes all the hard work of cleaning and creates a hygienic hazard. It is a common failure point that stems from impatience, but one that completely undermines the entire purpose of the cleaning regimen. The time and effort invested in proper drying pays dividends in safety and hygiene.
Techniques for Thorough Rinsing and Effective Drying
Achieving a perfect rinse and a bone-dry tube requires specific techniques. For rinsing, simply running water through the tube is a good start, but for best results, the tube should be flushed and filled multiple times. Filling the tube completely with clean water, agitating it, and then draining it completely is more effective at removing the last traces of cleaner than a simple continuous flush. This process should be repeated at least three to five times.
For drying, gravity is your simplest tool. Hang the tubing vertically, or in a U-shape, allowing water to drain out completely. This method is effective but can be slow. To accelerate the process, one can force air through the tube. A low-pressure, filtered air source is ideal. Be cautious not to use an oily, unfiltered compressed air source from a workshop, as this will re-contaminate the tube with oil and particulate matter. A simple, dedicated aquarium air pump with a filter can work well. For a final, thorough drying step, especially in critical applications, flushing the tube with a small amount of 70% isopropyl alcohol can be effective. The alcohol helps to displace the water and then evaporates much more quickly and completely than water alone, leaving a dry, disinfected surface. After the alcohol flush, a final purge with clean air will remove the alcohol vapor.
The Fourth Common Mistake: Ignoring Temperature Limitations
Heat is a powerful tool in the world of cleaning and sterilization. It can accelerate chemical reactions, making cleaners more effective, and at high enough temperatures, it is one of the most reliable methods for killing microorganisms. It is tempting, therefore, to apply heat liberally when dealing with silicone tubing. However, this approach is fraught with peril if one does not understand the specific thermal properties and limits of the material. Treating all silicone as capable of withstanding any temperature is a mistake that can lead to melting, warping, or a subtle degradation of its properties.
The “Boil and Forget” Fallacy: Heat’s Double-Edged Sword
A common home method for sterilization is boiling. While silicone is generally known for its high-temperature resistance, “boiling” is not a universally safe procedure for all types of silicone tubing. The temperature of boiling water is approximately 100°C (212°F). Most standard grades of silicone can handle this temperature without issue. However, some softer, specialized formulations or lower-quality products may have a maximum continuous operating temperature that is close to or even below this point.
Exposing such tubing to boiling water can cause it to become overly soft, tacky, or permanently deformed. The “boil and forget” approach, where tubing is left in a boiling pot for an extended period, is particularly risky. Even for high-grade silicone, prolonged exposure to high heat can accelerate the natural aging process of the polymer. Heat is a form of energy, and pumping too much energy into the polymer matrix can eventually start to break the weaker bonds within the material, leading to a gradual loss of elasticity and strength. Heat is a powerful tool, but it must be wielded with precision, not as a blunt instrument.
Understanding Your Tubing’s Specific Heat Tolerance
The critical piece of information you need is the manufacturer’s specification for maximum operating temperature. Not all silicone is created equal. A general-purpose silicone tube might be rated for continuous use up to 180°C (356°F), while a high-performance, platinum-cured grade might be rated for 220°C (428°F) or even higher for intermittent periods. Conversely, a very soft, specialized tube might have a much lower limit. Manufacturers provide these specifications for a reason (jesilicone.com). Ignoring them is like ignoring the redline on a car’s tachometer—you might get away with it for a short time, but eventually, you will cause damage.
Before you use hot water, a dishwasher with a sanitizing cycle, or any form of heat treatment, you must verify the thermal limits of your specific product. If you do not know the specifications, the most prudent course of action is to be conservative. Use warm water (around 50-60°C or 120-140°F), which is hot enough to significantly boost the effectiveness of most detergents, but well below the danger zone for almost all types of silicone. Using heat without knowledge is a gamble with your equipment.
Autoclaving and Sterilization: A Professional’s Approach
In medical, pharmaceutical, and laboratory settings, simple cleaning and sanitizing are not enough; sterilization is required. Sterilization is the process of killing all microbial life, including resilient bacterial spores. The gold standard for sterilizing heat-stable items is the autoclave. An autoclave is essentially a high-tech pressure cooker. It uses high-pressure steam at temperatures typically ranging from 121°C (250°F) to 134°C (273°F).
Only silicone tubing specifically rated as “autoclavable” should ever be placed in an autoclave. Most high-quality, platinum-cured silicone tubing is designed for this. During autoclaving, the tubing must be properly prepared. It should be cleaned first, as the steam needs to make direct contact with the surfaces to be effective; dirt and biofilm can act as an insulating barrier. The tubing should not be coiled too tightly or clamped, as this can create stress points and prevent steam from penetrating all areas. After the cycle, the tubing will be hot and may be slightly “tacky” to the touch. It should be allowed to cool completely, during which time it will return to its normal state. Repeated autoclaving will eventually cause silicone to age—it may become stiffer or more brittle over many cycles—so tracking the number of sterilization cycles is an important part of a preventative maintenance schedule in a professional environment (CDC, 2016).
The Fifth Common Mistake: Employing a One-Size-Fits-All Cleaning Method
Perhaps the most subtle error in maintaining silicone tubing is to believe that a single cleaning protocol is sufficient for all types and all applications. The diversity of silicone formulations and the vast range of contexts in which it is used demand a more nuanced and adaptive approach. Cleaning a tube used for a home aquarium is fundamentally different from cleaning a high-pressure hose in a factory or a catheter in a hospital. Applying a generic cleaning method across these diverse scenarios is an exercise in inefficiency at best, and a dangerous oversight at worst.
Food-Grade vs. Medical-Grade: Nuances in Sanitization
The distinction between “food-grade” and “medical-grade” is not merely a label; it reflects different standards of material composition and required cleanliness. Food-grade silicone tubing must be made from materials that are non-toxic and will not leach harmful substances into food or beverages. The cleaning goal here is to achieve a level of sanitation that eliminates spoilage organisms and common pathogens, preventing off-flavors and ensuring consumer safety. For this purpose, mild detergents followed by a hot water rinse or a sanitizing soak in a percarbonate or acid-based solution (for brewing) is typically sufficient.
Medical-grade silicone, on the other hand, operates under a far more stringent regime. The material itself is often platinum-cured to ensure the lowest possible level of extractable compounds and is tested for biocompatibility. The cleaning process for medical tubing is often just the first step in a multi-stage process that culminates in sterilization. The goal is not just sanitation but the complete eradication of all microorganisms, including bacterial spores and viruses. This often involves validated cleaning cycles with specific detergents, followed by autoclaving, gamma irradiation, or ethylene oxide (EtO) sterilization. Using a simple food-grade cleaning method on a piece of medical equipment would be a catastrophic failure of protocol. The context dictates the necessary level of rigor.
Cleaning Industrial Hoses: Tackling Oils, Fuels, and Chemicals
Moving into the industrial sphere, the challenges shift once again. Here, silicone hoses might be used to transport coolants, lubricants, chemical intermediates, or even abrasive materials. The primary contaminants are not biological but chemical. The cleaning method must be chosen based on the chemical nature of the substance being conveyed. For example, to remove a petroleum-based oil or grease, a simple soap and water wash may be ineffective. A stronger degreaser or a carefully selected solvent might be necessary.
However, as we have established, many solvents are harmful to silicone (medicalsiliconetube.com). This creates a complex problem that requires careful material selection from the outset. Often, specialized fluorosilicone grades or other resistant polymers are used in these applications. When cleaning is required, the procedure must be designed to effectively remove the industrial residue without using a chemical that will degrade the hose material. This might involve using a specific surfactant-based industrial cleaner rated for use with silicone or flushing with a compatible fluid that can dissolve the contaminant. For something like a specialized high-pressure reinforced tubing, the cleaning process must also account for the braided reinforcement layer, ensuring no cleaning agents are trapped within it.
The Special Case of Peristaltic Pump Tubing
Peristaltic pump tubing represents a unique case due to its specific mechanical function. In a peristaltic pump, rollers compress the tubing to propel fluid forward. This repeated compression and relaxation places immense mechanical stress on the tube wall. The cleaning of this tubing must not only remove contaminants but also be done in a way that does not exacerbate this mechanical fatigue.
For example, using a cleaning method that causes the silicone to become even slightly stiffer or more brittle will dramatically shorten its life in a peristaltic pump. The tube will fail by developing cracks or splits much more quickly. The cleaning process should be gentle, using mild detergents and avoiding any chemical or temperature extreme that could alter the tubing’s durometer (hardness) or elasticity. After cleaning, it is also good practice to inspect the tubing for any signs of fatigue, such as clouding, crazing, or permanent deformation in the section that passes through the pump head. This application highlights the need to consider not just the chemical environment but also the mechanical demands placed on the tubing when devising a maintenance plan.
A Step-by-Step Guide to Flawless Silicone Tube Maintenance
Having explored the underlying principles and common pitfalls, we can now synthesize this knowledge into a coherent, step-by-step methodology. This is not a rigid prescription but a flexible framework that can be adapted to your specific needs. Think of it as a dance with the material, a sequence of movements designed to restore the tubing to its optimal state without causing harm. Following this logical progression ensures that each step builds upon the last, leading to a truly clean and well-maintained tube.
Phase 1: Initial Flush and Pre-Rinse
The journey begins with a simple but vital step: the pre-rinse. Immediately after use, if possible, flush the tubing with lukewarm water. The goal here is to remove the gross, loose contamination before it has a chance to dry and adhere to the tube walls. Think of it as clearing the table before you wash the dishes. This initial flush will dislodge the majority of residues—be it wort from brewing, milk from a dairy line, or a water-based coolant from an industrial process. This simple action dramatically reduces the workload for the cleaning agent in the next phase, making the entire process more efficient and effective. Forcing water through from a tap at a moderate pressure is usually sufficient for this stage.
Phase 2: The Cleaning Solution Soak and Agitation
With the loose debris gone, it is time for the chemical assault on the remaining, more stubborn soils. Prepare your chosen cleaning solution in a basin or bucket. As a default for most applications, a warm solution of mild, phosphate-free dish soap is excellent. For tougher organic soils, a warm solution of a percarbonate-based cleaner is a superior choice. Submerge the tubing completely in the solution. It is important to ensure the tube also fills with the solution on the inside. You can achieve this by holding both ends under the solution and working out any air bubbles.
Let the tubing soak. The duration of the soak depends on the level of soiling. A lightly used tube might only need 15-20 minutes, while a heavily soiled tube might benefit from soaking for several hours or even overnight. This is not a passive process; the cleaning agent is actively working to break down fats, proteins, and polysaccharides. Periodically, agitate the tubing in the solution to help dislodge loosened particles and ensure fresh cleaner is always in contact with the inner surfaces.
Phase 3: Mechanical Cleaning (The Gentle Scrub)
After the chemical soak has weakened the soil’s grip, it is time for gentle mechanical intervention. This is where your soft-bristled tube brush comes into play. Thread the brush through the entire length of the tubing, using smooth, deliberate strokes. The goal is not to scour, but to sweep. You are physically dislodging the softened biofilm and residue that the cleaner has loosened. Pay attention to the feel of the brush; you can often feel it making better contact with the tube wall after a few passes as the grime is removed. If the tube is too long for a brush, this is the phase where you would employ a recirculation pump to create turbulent flow, letting the moving fluid provide the mechanical cleaning action.
Phase 4: The Critical Rinsing Cycle
This is the phase that so many people rush, but its importance cannot be overstated. You must now remove every trace of the cleaning agent and the dislodged soil. Drain the cleaning solution and begin rinsing the tubing with copious amounts of clean, lukewarm water. Do not just run water through it once. A more effective method is to repeatedly fill the tube, cap the ends with your thumbs, shake it vigorously, and then drain. Repeat this process at least three to five times, or until the water runs completely clear and there is absolutely no trace of suds or a slippery feel to the tubing. For critical applications, a final rinse with distilled or deionized water is recommended to prevent mineral deposits from hard tap water from spotting the interior surface.
Phase 5: Drying and Proper Storage
The final phase is to create an environment hostile to new microbial growth. The tube must be dried completely. Hang the tubing in a vertical or U-shaped orientation in a clean, dust-free area with good air circulation. This allows gravity to do most of the work. To speed things up, you can force air through the tube using a low-pressure pump or even a hair dryer on a no-heat setting. A final flush with 70% isopropyl alcohol followed by an air purge is the gold standard for rapid, complete drying. Once bone-dry, store the tubing in a clean, dry place, away from direct sunlight or sources of ozone (like electric motors), which can degrade the silicone over time. Coiling it loosely in a sealed plastic bag can protect it from dust and airborne contaminants until its next use.
Frequently Asked Questions (FAQ)
Can I put silicone tubing in the dishwasher?
For many types of food-grade silicone tubing, the answer is yes, with some important caveats. First, you must confirm that your specific tubing is rated to withstand the high temperatures of a dishwasher’s cleaning and drying cycles (often reaching 70°C or 160°F or higher). Second, the tubing must be positioned securely on the top rack so it does not fall and come into contact with the heating element. Third, be aware that the harsh detergents used in dishwashers can accelerate the aging of silicone over time compared to gentle hand washing. It is a convenient option but may shorten the tubing’s ultimate lifespan.
How often should I clean my silicone tubing?
The ideal cleaning frequency depends entirely on the application. For food and beverage lines, tubing should be cleaned immediately after every use to prevent microbial growth. In a medical setting, cleaning protocols are strictly defined and are performed after each procedure. For less critical applications, such as moving water for an aquarium or a coolant loop, cleaning can be less frequent but should be done as part of a regular maintenance schedule or whenever any discoloration or buildup is observed. The rule of thumb is: when in doubt, clean it.
What’s the best way to remove stubborn stains or odors?
For stubborn organic stains (like from coffee or wine) or persistent odors, a long soak in a warm solution of a percarbonate-based cleaner (like OxiClean Free) is highly effective. The oxidizing action breaks down the compounds causing the stain and odor. For greasy or oily residues, a soak in a strong dish soap solution followed by a gentle scrub can work. As a last resort for odors, you can try soaking the tube in a dilute solution of white vinegar and water, followed by a very thorough rinse and airing out.
Is it possible to sterilize silicone tubing at home?
Achieving true clinical sterilization at home is difficult, as it requires specialized equipment like an autoclave. However, for applications like baby bottles or home brewing, you can achieve a high level of sanitation. After a thorough cleaning, boiling the tubing in water for 5-10 minutes is a common method, provided the tubing is rated for that temperature. This will kill most active bacteria and viruses. It will not, however, reliably kill resilient bacterial spores, which is why it is considered sanitation, not sterilization.
How do I know when it’s time to replace my silicone tubing?
Look for physical signs of degradation. If the tubing has become stiff, brittle, or cracked, it must be replaced. If it feels permanently tacky, soft, or gummy to the touch, its chemical structure has been compromised. Other signs include persistent discoloration that cannot be cleaned, a cloudy or crazed appearance, or any permanent kinks or flat spots that restrict flow. In high-use applications like peristaltic pumps, tubing should be replaced on a regular schedule based on hours of use, even before visible signs of failure appear.
What is the difference between cleaning, sanitizing, and sterilizing?
These terms represent three distinct levels of microbial control. Cleaning is the physical removal of soil and debris, which also removes many germs. Sanitizing is the reduction of microorganisms to a level deemed safe by public health standards; it typically kills over 99.9% of common bacteria but does not eliminate all of them or their spores. Sterilizing is the complete elimination or destruction of all forms of microbial life, including bacteria, viruses, fungi, and hardy bacterial spores.
Conclusion
The task of how to clean silicone tubing, when approached with care and understanding, transcends mere maintenance. It becomes a practice of stewardship for a material that serves us in countless, often unseen, ways. We have journeyed through the molecular structure of silicone, the hidden worlds of biofilms, and the catalogue of common errors that can compromise this versatile polymer. The path from a soiled tube to a pristine one is not paved with brute force or harsh chemicals, but with a thoughtful application of gentle chemistry, patient soaking, delicate mechanical action, and a profound respect for the material’s inherent properties and limitations. By embracing a methodical approach—preparing correctly, choosing agents wisely, rinsing thoroughly, and drying completely—we do more than just clean a tube. We ensure safety, preserve flavor, maintain sterility, and honor the integrity of the object itself. This mindful process transforms a simple conduit into a reliable and long-lasting component, ready to perform its function flawlessly.
References
Centers for Disease Control and Prevention. (2016). Guideline for disinfection and sterilization in healthcare facilities. U.S. Department of Health & Human Services.
Donlan, R. M. (2001). Biofilm formation: A clinically relevant microbiological process. Clinical Infectious Diseases, 33(8), 1387–1392.
Donlan, R. M., & Costerton, J. W. (2002). Biofilms: Survival mechanisms of clinically relevant microorganisms. Clinical Microbiology Reviews, 15(2), 167–193. https://doi.org/10.1128/CMR.15.2.167-193.2002
Ruixiang. (2025, January 20). Top choices for chemical resistant tubing: an in-depth look. Dongguan Ruixiang Precision Silicone Products Co.,Ltd. https://www.medicalsiliconetube.com/a-top-choices-for-chemical-resistant-tubing-an-in-depth-look.html
SHENZHEN JIAJIE RUBBER & PLASTIC CO., LTD. (2024, June 13). Silicone tubing: What it is, varieties, characteristics & applications. LinkedIn. https://www.linkedin.com/pulse/silicone-tubing-what-varieties-characteristics-applications-qlcsc